- Why do you need food photography for restaurants?
- What do you need to get started on your restaurant food photography journey?
- Essential information for restaurant food photography
- ISO
- Aperture
- Shutter Speed
- RAW format
- Tips for the best food photography for restaurants
- Composition
- Color theory
- The best angles for food photography
- Lighting for food photography
- Food styling
- Inspiration
- How to choose food photography for your online menu/website/social media
We eat with our eyes first, so why not serve your clients mouth-watering food photos that are just as good as your dishes? Before ordering, potential customers look up your dishes, prices, food descriptions, and pictures to decide if they want to eat from your restaurant. The photographs are the decision-makers!
In this article, we provide you with a complete beginner’s guide to restaurant food photography that will help you become a master with just a little bit of practice.
Why do you need food photography for restaurants?
Excellent restaurant food photography should be a part of every business’s marketing strategy. There is a lot of competition in the food business, but good photography can make your restaurant stand out among the rest.
Here are some benefits of professional food photography for restaurants that will convince you to try it:
- Your restaurant becomes a brand: when you consistently post quality pictures with attractive descriptions, you create a professional image that your followers will remember. You want your business to be known as one that cares to its customers and the products it delivers;
- You get more clients: people are more likely to order your food if the menu has good photos and they know exactly what they will receive;
- It helps with SEO optimization: Google ranks your website by also analyzing the pictures. Be sure to add relevant images with descriptive alt text that is easy to find by search engines.
What do you need to get started on your restaurant food photography journey?
There is a misconception that to get good restaurant food photographs, you need costly equipment. But the secret here is you, the one who uses the equipment, not how much money you spent on it.
Did you just open your restaurant? GloriaFood is an online ordering system that makes your menu set-up very easy and gives you access to a free photo gallery that you can use for your products before taking some of your own.
Easily set-up your menu and get more clients
Install an online ordering system to your website for free
If you don’t feel like investing in new equipment, look no further, your smartphone can be your camera. However, you must use one with a good camera. Look for a big sensor, more pixels, multiple lenses, small aperture, and available pro mode for the best results.
Check out these tips for fantastic food photography with a smartphone:
- Use Pro mode: here, you can choose every setting for the photo’s exposure. You can find a detailed explanation below in the “Essential information for restaurant food photography” section;
- Use Portrait mode: do you enjoy photos of food with a blurry background? You can get that effect instantly with this mode;
- Shoot in natural light: phones are not as good as cameras in low light, so try to only shoot food when you have plenty of light. If you must take a picture with artificial light, go into your phone camera’s settings and choose the white balance according to the type of light (tungsten, fluorescent, etc.).
You can also invest in cheap gear to take professional restaurant food photography without breaking the bank. Here is what you need to get started:
- Camera: when you are a beginner, an entry-level camera will do the job just fine. Some examples are Nikon D3500, Canon 850D, or Canon 90D;
- Lenses: with a DSLR camera, lenses for restaurant food photography must be acquired separately. A good option for food pics would be a 50mm F1.8 lens;
- Tripod: you don’t want your pictures to be unintentionally blurry, so use a tripod to get a sharp photo in any type of light. You may also need a tripod arm extender so you can take photos from directly above the food;
- Lights: for beginners, a single light will be more than enough. Invest in a continuous light source with an attached softbox for soft, diffused light that highlights every dish;
- Backdrops: you can find professionally made backdrops, but you can also improvise! Use any textured material you have around, and you can even paint them yourself on canvas for variety;
- Props: they help you tell a better story about the presented dish. They can be anything from fresh produce, cutlery, or fancy plates. Visit vintage shops and home stores to build a prop storage from which you can choose every time you shoot;
- Editing software: most food photographers are Adobe Photoshop fans. You will have to pay for a subscription, and you can find countless training videos on YouTube for editing. You can also use free software like Canva on your computer and Snapseed on your phone, but you will not have access to advanced settings. Other tools, like Picsart, allow for creative editing with AI, simplifying the entire process.
Essential information for restaurant food photography
Have you tried your hand at restaurant food photography before but were unhappy with the results? That is because you used the Auto mode, where the camera chooses your settings. To get the perfect picture, you must learn to use Manual mode, where you can modify the settings according to each environment.
Your camera, be it a smartphone, mirrorless, or DSLR, is a complicated system with thousands of components, but don’t be alarmed. We are here to help you master it. Here are the basic settings you must pay attention to:
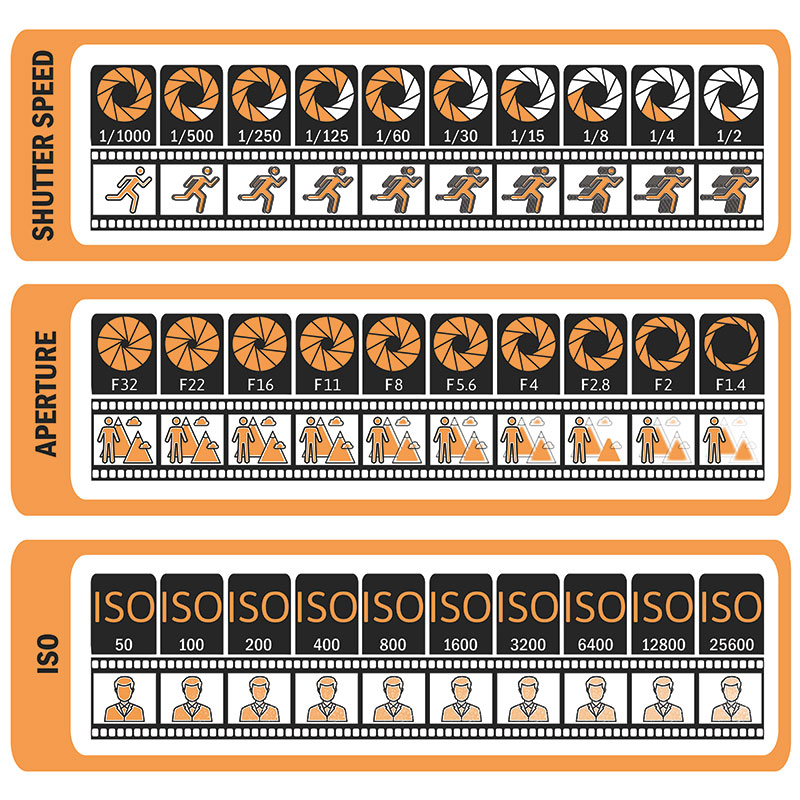
ISO
ISO is your camera’s sensitivity to light, and its values are 100, 200, 400, 600, 800, 1600, and higher, depending on your equipment’s range. You choose ISO value depending on the lighting conditions you have. Simply put, you use ISO 100 for a brightly lit space and ISO 1600 for a dim room.
The higher the ISO, the brighter the picture. Remember that a photo will have more grain/noise at a bigger ISO. Let’s see some examples so you can get used to choosing the correct ISO:
- The subject is on the table, outside, at noon time: use the smallest ISO possible, as the light is very bright;
- The subject is on a table near a window on a cloudy day: use ISO 400 as there is no direct light;
- The subject is on a restaurant table, about 3 feet from a window: use ISO 1600 to compensate for the lack of light.
Aperture
To easily understand what aperture does, imagine a cat’s pupils. If there is a lot of light, the pupils are small, and they get bigger to allow more light in a dark environment. The same applies to the camera aperture, with values like: f/1.4, f/2, f/2.8, f/4, f/5.6, f/8, f/11, f/16, and f/22.
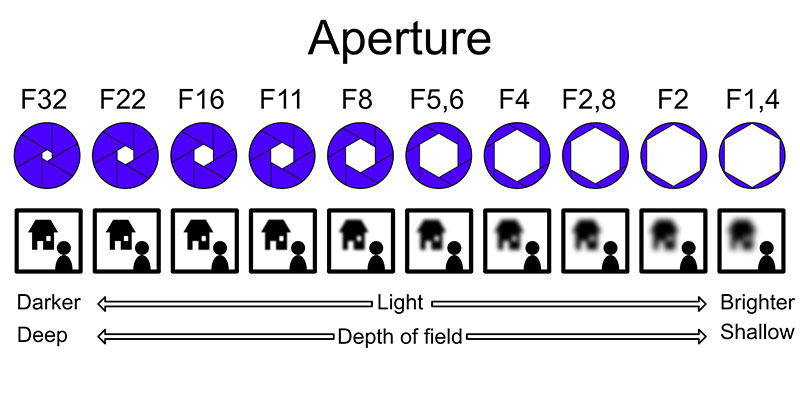
If you want to highlight a single element in your photo, let’s say a fresh cookie, you can use f/1.4 to create a blurry effect behind the dessert. If you photograph a table spread and want all the elements visible, use f/8 or higher.
Shutter speed
Shutter speed refers to the amount of time the shutter remains open to capture the picture. The faster the shutter speed, such as 1/4000 or 1/3200, the least amount of light in your photograph and vice versa.
Fast shutter speeds are good for sports photography when you want to immortalize a subject’s rapid movement, and slow shutter speeds such as 1/15 and even 30 seconds are ideal for night photography.
For food photography, it is best to use a value in-between, bigger than 1/60 to avoid a blurry picture, and smaller than 1/500 as the image will be very dark.
RAW format
If you’ve taken photos before, you are probably used to formats such as JPEG or PNG. These are great for vacation or family pics but not ideal for food photography, which usually needs some editing.
For professional, quality food photography, platforms like Depositphotos offer a vast collection of high-resolution images that can serve as inspiration or be used directly in marketing materials, ensuring that your visuals meet the industry standards and captivate your audience.
Instead, use RAW format that contains uncompressed image data. It allows you to capture more details, and you can edit it any way you want without losing quality.
Choose to shoot RAW by going into your camera’s or smartphone’s settings and changing the usual JPEG format to RAW.
Tips for the best food photography for restaurants
Now that you know the basics of photography, let’s delve into more advanced information that will help you get the perfect picture every time. Here are some restaurant food photography tips and tricks you must try for your restaurant’s marketing:
Composition
Composition refers to the way the elements are arranged in the picture. There are some rules in photography everyone must learn in the beginning, so they creatively break them afterward:
- rule of thirds: divide a photo into nine equal parts with two horizontal and two vertical lines; the subject should always be positioned in one of the conjunctions points between the lines;
- golden ratio: also named Fibonacci’s spiral, is a composition technique used by all the great artists, from music to architecture. When you apply the diagram below to a picture, the subject should be at the end of the spiral, and all other elements must lead to it;
If you lack inspiration, here are more composition ideas that you can try:
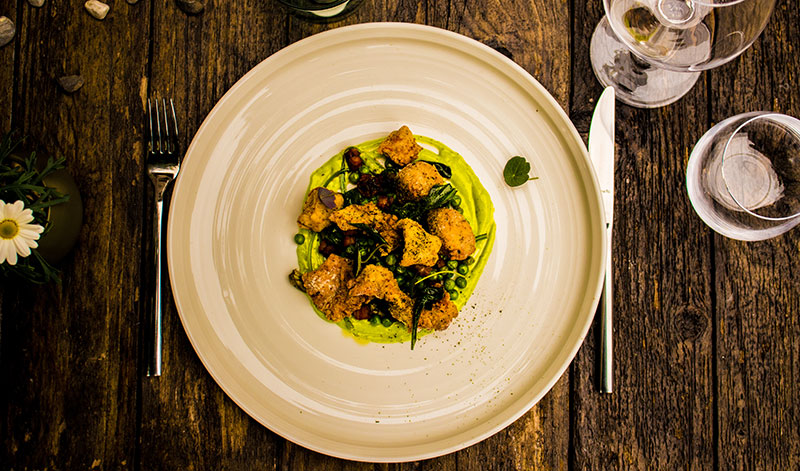
- framing: place the subject in the middle and surround it with elements; it replicates the effects a standard photo frame has, highlighting your chosen food. Below, you can see how the food is perfectly framed by the plate, cutlery, and wood table;
- create diagonals: place some elements in the frame diagonal to your subject. This way, your eyes will follow the lines and naturally arrive at your subject;
- negative space: the subject is in a corner or the middle and accompanied either by a plain backdrop or props in a neutral color, so the food is the star;
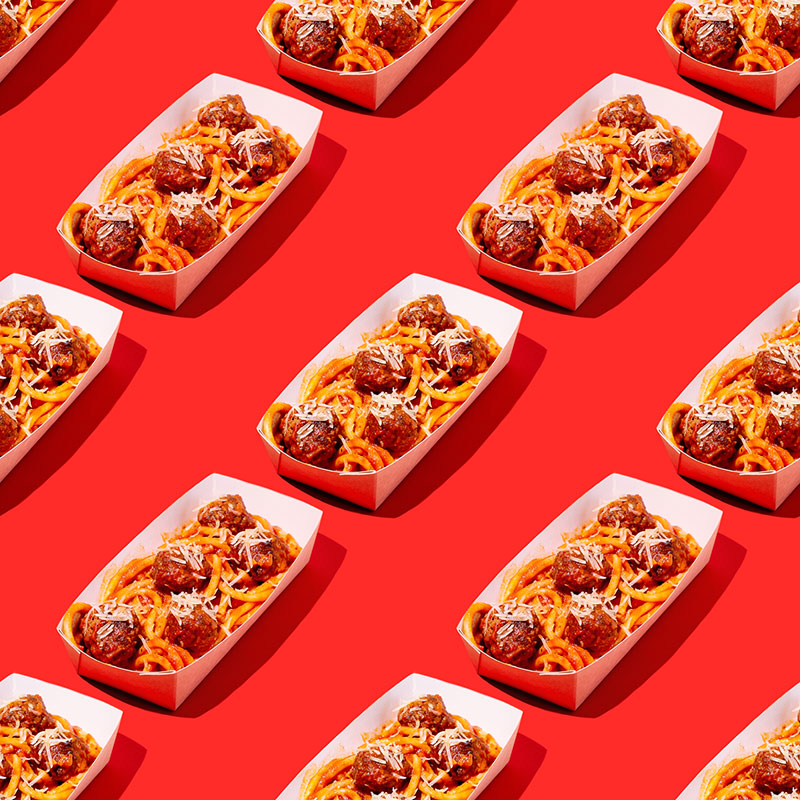
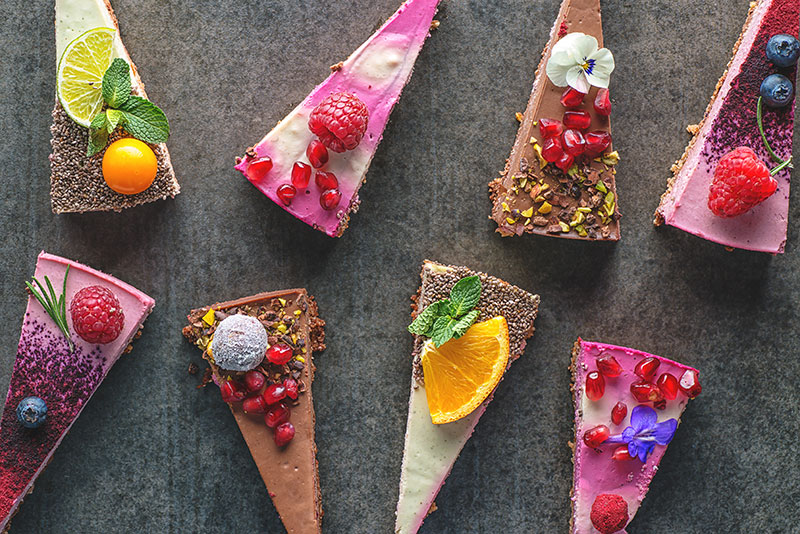
- create patterns: there is a reason you enjoy clothes with a repetitive pattern: it pleases the eye. Attract attention by arranging your food in patterns, ideal for small items such as cookies or ice cream;
Color theory
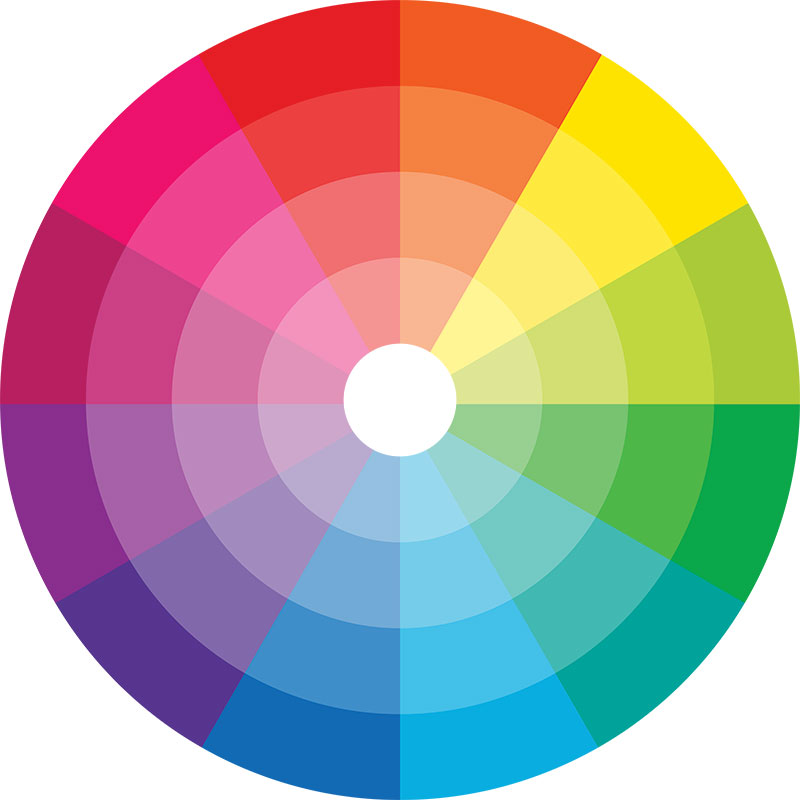
Remember the color wheel we were all taught in school? The primary colors are red, blue, yellow, and secondary colors are combinations of the three. To create a visually pleasing food photograph that tells a story, follow these rules:
- use complementary colors: you can notice this combination best in movies, where directors abuse the mixture of blue and orange to create a certain mood. More examples of complementary colors (placed on the opposite side of the wheel): yellow-purple, red-green;
- combine neutral with powerful colors: if you have brown food, you can highlight it with a colorful background and the other way around;
- try different shades of the same: for example, if you have a pink dessert, you can play around with props in other shades of pink to create dimension.
The best angles for food photography
The perfect angle depends on the food you photograph and the mood you want to create. There are three principal angles that most food photographers use:
- Overhead angle: where you see the dish directly from above, ideal for photographing an entire spread on a table. It plays up texture, but it does not create dimension;
- ¾ angle: it is the perspective from which your clients usually see your food, so it creates a sense of familiarity; the angle can vary from 25 to 75 degrees and gives a complete view of the food. Great for salads and pies;
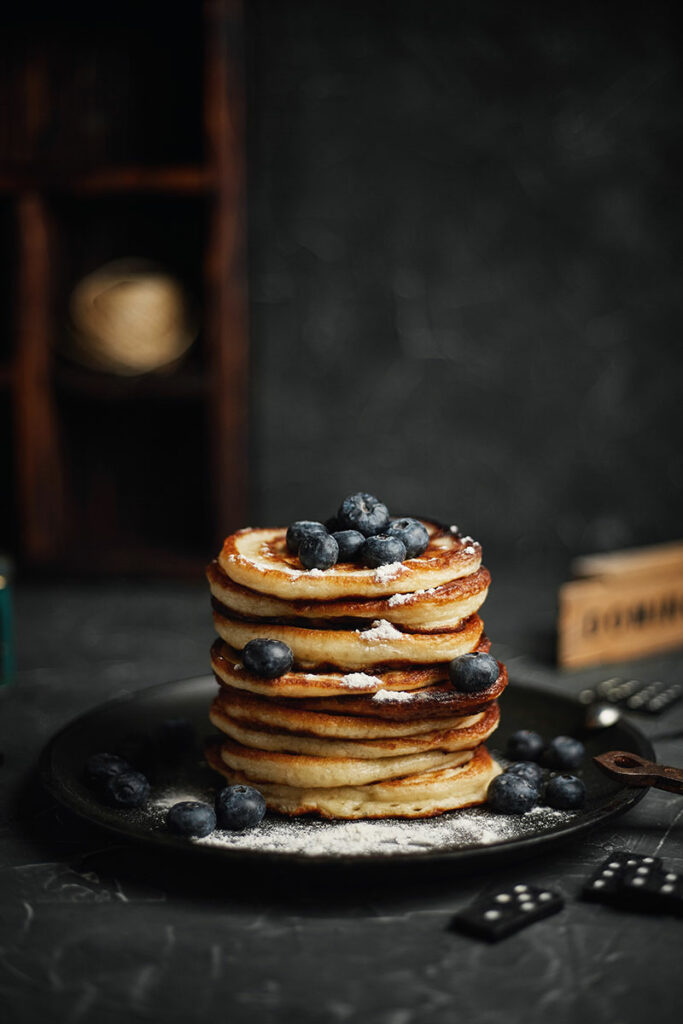
- Straight-on angle: the photograph is taken parallel to the dish, usually to highlight the food’s height and offer more details. Perfect for burgers or a stack of pancakes;
Lighting for food photography
There are two types of lighting for food photography: natural and artificial. One is not better than the other, but each one has its advantages:
- Natural light: first of all, it’s free and softer than the artificial one (the shadows won’t be as visible). It is also limited. You can only photograph during daylight which can be a big problem in the winter months;
- Artificial light can be used whenever and is easier to control (you can move it, you can modify the light’s intensity). In restaurant food photography, artificial lighting will produce harsh shadows that you can erase with a diffuser.
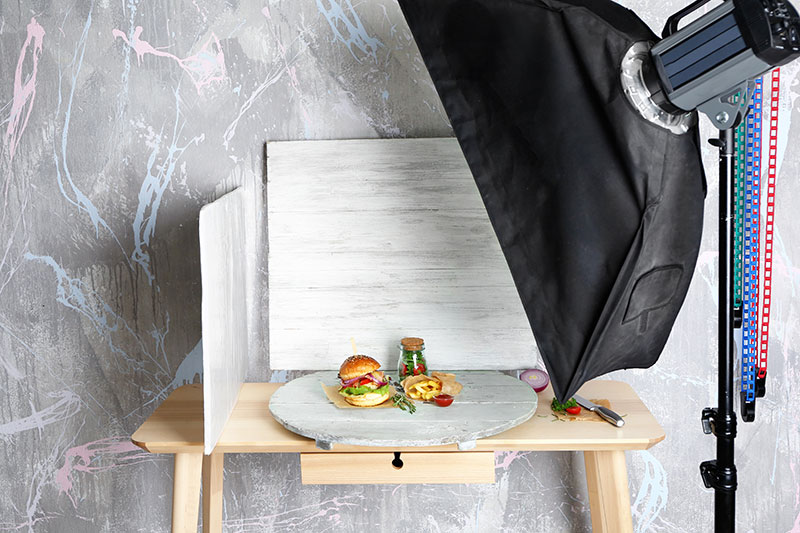
A basic restaurant food photography set-up includes:
- A light source: be it a window or a continuous source of light that can be placed in different ways around the subject to create specific moods. You can change both the height (at the same level, above the subject or below the subject) and the angle of the light (behind the subject, 45 degrees behind, directly on the side, 45 on the front, from the front);
- A diffuser: you can invest in a professional diffuser, or you can use a sheer white material to soften the light and make the shadows less black;
- A reflector: again, it can be simple white cardboard that you position on the other side of the light to refract more light on the subject. Without it, only a part of the food will have the light on it, and the rest would be in the shadows.
Food styling
Restaurant food photography and food styling go hand in hand; you can’t have one without the other. You now have all the knowledge you need to take beautiful photos, but you still need to learn how to arrange the food and props in the frame. Here are some ideas you can experiment with:
- Use small portions of food: don’t crowd the plate and its surroundings. A minimalist photograph is more esthetically pleasing than one with too many elements;
- Create texture: use cloth napkins, different types of backgrounds, and props to create much-needed texture. It will give viewers the feeling they can touch everything in the photo;
- Don’t use shiny elements: ranging from cutlery, plates, and glasses to backdrops. Stay away from anything shiny because they do not photograph well;
- Create contrast: you can do this by using both light and dark colors in your frame. You can also concentrate the light on the main subject and keep the rest of the picture in shadow;
- Use ingredients around your dish: show clients what you used to prepare their favorite dish by adding the raw ingredients in the photographs;
- Create movement: if you are photographing a dish served with a sauce, try pouring it while photographing to create a dramatic effect.

Inspiration
Before creating your masterpieces, check out what other food photographers do to get inspired! Instagram is full of photography accounts that you can search through using hashtags such as #foodphotography, #restaurantfoodphotography, #foodstyling, and #foodblogger.
Check out your local competition to see what kind of photographs they are using and if they are successful.
While the tips explained above apply to every type of restaurant food photography, you should always start with a concept when you shoot food. Where will the photos be published? What mood do you want to create? What message do you want to send? Let’s see how different your images should be for every type of platform:
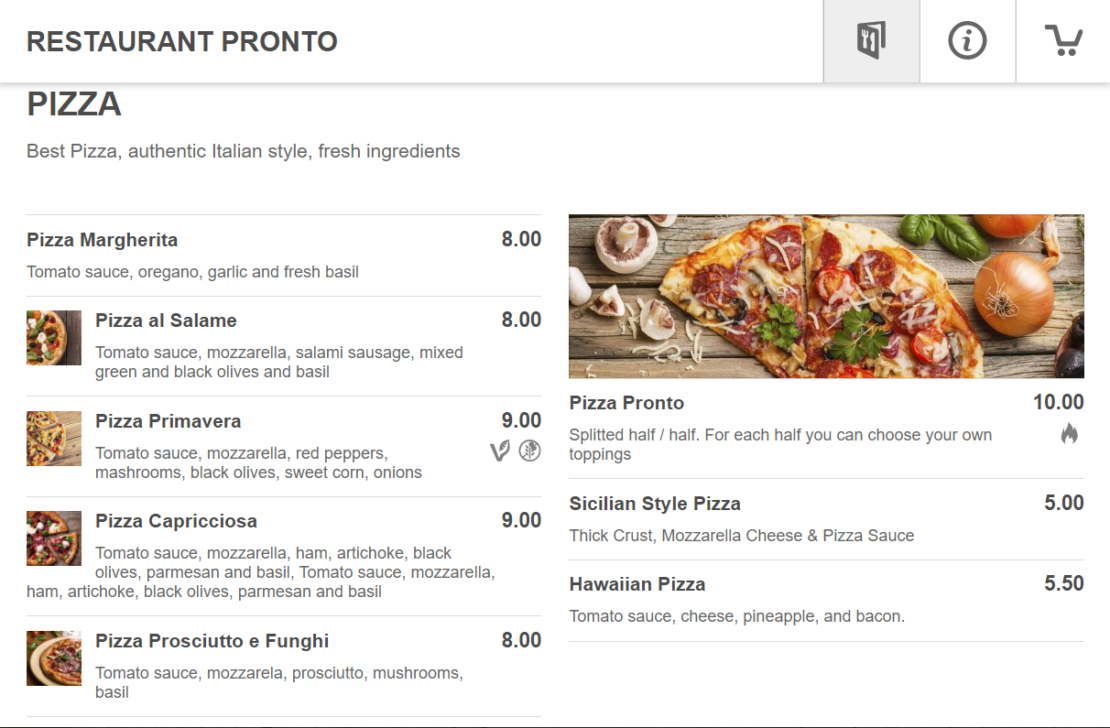
- Food photography for restaurant menu: these pictures should tell a cohesive story as they are all seen at the same time when the clients decide what to order. Choose simple, minimalist photos where the dish is the star, and there are not many props to distract from it. Use the same lighting and background colors to create a united look. If you use GloriaFood, you can add the new photos to the menu in minutes, and you have a preview to see how it would look for potential customers;
- Restaurant food photography for website: a restaurant’s website should be simple yet attractive, so clients will be incentivized to order, but not deterred by a crowded design. You can choose either a flat lay (a picture taken from above of several dishes arranged on a background) or a spectacular 45 angle photo of your star dish to put on your front page. With a Sales Optimized Website, adding new images is easy! You get access to an intuitive website editor where you can just drag and drop your mouth-watering pictures.
Your photography must be on the front page
Get your own Sales Optimized Website
- Restaurant food photography for social media: your communication through social media should also have a concept behind it, and the photos should match. For example, if you choose a fun voice, add colorful and vibrant photos, and if you choose a fine art vibe, your photos can resemble paintings with sophisticated backgrounds and props. Instagram food restaurant photography is already a big trend you can capitalize on by being aware of what is popular. Participate in food photo trends only if they match your values, don’t post burgers for more views if you only serve fine cuisine.
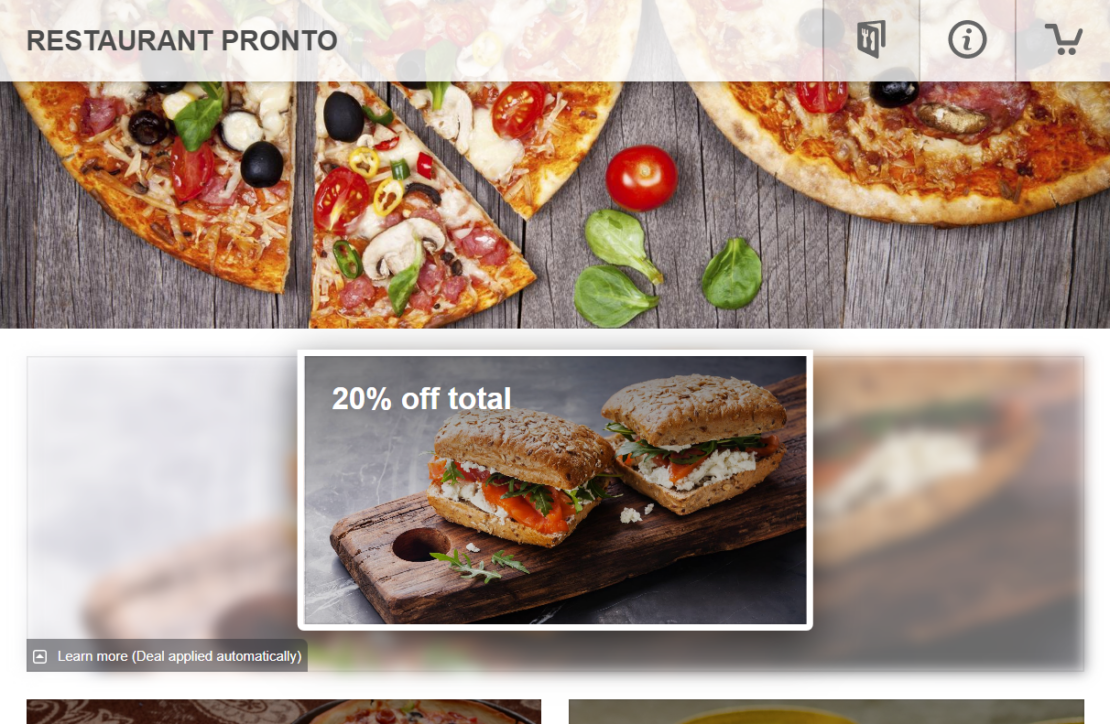
- Restaurant food photography for promotions: to attract more clients you can implement attractive promotions that will incentivize customers to place an order. With GloriaFood’s online ordering system, adding a promotion is intuitive. The platform guides you through the necessary steps and you can select a tried and tested promotion. The photographs for promotion will be visible at the top of the menu, so choose a quality photo with high contrast and bright colors.
If you’re looking for an easy way to setup your online restaurant menu with mouth-watering food photos, check out the video below for detailed instructions.

Conclusion
Professional restaurant food photography is the way to go if you want to make your business known and attract more clients. You don’t need expensive equipment, just a will to learn and time to practice. In no time and with the right concept and props, you can also create mouth-watering pictures that will determine people to visit your restaurant or order in.

- Why do you need food photography for restaurants?
- What do you need to get started on your restaurant food photography journey?
- Essential information for restaurant food photography
- ISO
- Aperture
- Shutter Speed
- RAW format
- Tips for the best food photography for restaurants
- Composition
- Color theory
- The best angles for food photography
- Lighting for food photography
- Food styling
- Inspiration
- How to choose food photography for your online menu/website/social media
Related topics